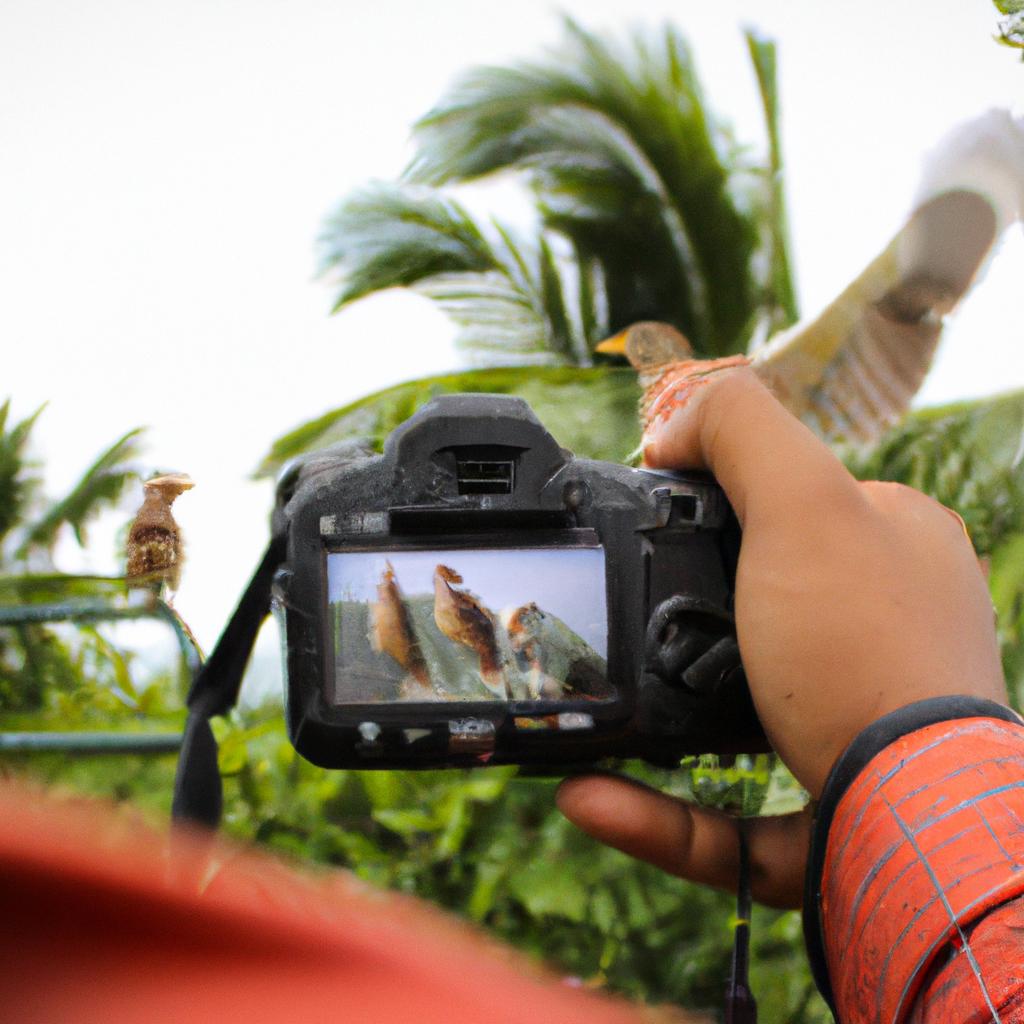
Bird photography is a captivating art form that requires skill, patience, and an eye for composition. A well-composed bird photograph not only showcases the beauty of these feathered creatures but also tells a story through its composition. By carefully considering elements such as framing, rule of thirds, leading lines, and balance, photographers can create visually appealing images that capture the essence of their avian subjects.
For instance, imagine capturing a stunning image of a majestic bald eagle soaring through the sky. Through proper composition techniques, the photographer could position the eagle slightly off-center using the Rule of Thirds, allowing empty space in front of it to convey a sense of freedom and movement. Additionally, by incorporating diagonal leading lines from the wings or surrounding landscape, the viewer’s eye would be guided towards the focal point – the eagle itself. The result would be a compelling image that not only portrays the beauty of this iconic bird but also evokes a feeling of awe and admiration.
Mastering bird photography goes beyond simply pointing and shooting; it requires careful consideration of various compositional elements. This article aims to explore how photographers can enhance their skills in composing breathtaking bird photographs by delving into key principles such as framing, use of negative space, symmetry, and patterns. With an understanding of these principles, photographers can elevate their bird photography to new heights and create images that truly captivate viewers.
Framing is a crucial aspect of composition in bird photography. By using natural elements such as branches, leaves, or even architectural structures, photographers can create frames within the frame. These frames not only add visual interest but also draw the viewer’s attention to the subject. For example, photographing a colorful parrot perched on a branch with foliage surrounding it creates a sense of depth and immersion, making the viewer feel like they are peeking into the bird’s world.
Negative space refers to areas in an image that are intentionally left empty or devoid of significant details. It allows the subject to stand out and become the focal point. In bird photography, negative space can be used to emphasize the delicate features or unique characteristics of a bird. Placing a small bird against a vast expanse of sky creates a contrast that highlights its size or intricacies of its plumage.
Symmetry and patterns can also enhance the impact of a bird photograph. Birds often exhibit symmetrical features or engage in repetitive behaviors, and capturing these elements can result in visually striking images. For instance, photographing a flock of birds flying in perfect formation creates an aesthetically pleasing pattern that draws the viewer’s eye and adds dynamism to the composition.
Additionally, considering balance is essential when composing bird photographs. Balancing elements within the frame helps create harmony and stability in an image. This could involve placing a large bird on one side of the frame and balancing it with smaller birds or complementary elements on the other side.
In conclusion, mastering composition techniques is crucial for creating captivating bird photographs that tell stories through their arrangement of elements. By understanding framing, negative space, symmetry, patterns, and balance – photographers can elevate their work from mere snapshots to powerful visual narratives that evoke emotions and appreciation for these magnificent creatures.
The Power of the Rule of Thirds
Picture this: you are out in a serene natural setting, camera in hand, ready to capture the beauty of birds in flight. You spot an elegant heron gracefully perched on a branch. As you prepare to take the perfect shot, you remember one key compositional technique that can enhance your image – the Rule of Thirds.
The rule of thirds is a fundamental principle in photography composition that involves dividing an image into nine equal parts using two horizontal and two vertical lines. By positioning key elements along these lines or at their intersections, photographers create visually balanced and engaging compositions.
When applied effectively, the rule of thirds can transform a simple bird photograph into a captivating work of art. Here’s how it works:
- Enhanced Balance: Placing your subject off-center allows for a more dynamic balance within the frame. Imagine capturing an image where the bird’s eye aligns with one intersection point while its wings extend across another line – this creates visual tension and intrigue.
- Leading Lines: Utilizing leading lines within each third helps guide viewers’ eyes towards the main subject, drawing them deeper into the photograph. Consider incorporating branches or other natural elements that lead directly to your focal point.
- Negative Space: Leaving ample negative space around your subject adds breathing room and emphasizes its importance. This technique draws attention to even small details like intricately patterned feathers or distinct markings on their beak.
- Background Harmony: Positioning significant background elements along one-third lines ensures they complement rather than overwhelm your subject. A well-balanced background provides context without detracting from the main focus.
By applying these principles, photographers have been able to capture breathtaking images throughout history [^1^]. Take for instance Ansel Adams’ iconic photograph “Moonrise Hernandez” (1941). In this black-and-white landscape shot, he positioned not only the moon but also the distant mountains and cemetery along one-third lines, creating a harmonious composition that draws viewers into the scene.
In summary, mastering the rule of thirds is essential for any bird photographer seeking to capture visually striking images. By employing this technique, you can achieve enhanced balance, guide your audience’s gaze with leading lines, emphasize your subject through negative space, and create background harmony. In our next section, we will explore another powerful compositional tool: utilizing leading lines to further enhance the impact of your bird photography.
Utilizing Leading Lines to Create Impact
Section H2: ‘Utilizing Leading Lines to Create Impact’
Building on the concept of composition, we now delve into another powerful technique that can elevate your bird photography to new heights. By Utilizing leading lines effectively, you can create impactful images that draw viewers’ attention and guide their gaze through the frame.
Example: Imagine capturing an image of a majestic eagle in flight against a vibrant sunset backdrop. The eagle’s wings outstretched, it soars gracefully across the sky. To enhance the visual impact, you position yourself below the bird as it glides above. In this scenario, incorporating strong leading lines by framing the eagle with vertical tree trunks or converging power lines creates a sense of depth and guides viewers’ eyes towards the focal point – the magnificent bird itself.
To master the art of using leading lines in your bird photography, keep these key considerations in mind:
- Directionality: Choose leading lines that direct viewers’ gaze toward your subject. Vertical or diagonal lines can add dynamism and energy, while horizontal lines may evoke serenity and stability.
- Convergence: Lines that converge towards your subject create a natural vanishing point, adding depth and drawing attention to the main element within the frame.
- Contextual Relevance: Ensure that the chosen leading lines are relevant to both your subject and its environment. They should complement and enhance rather than distract from your intended narrative.
- Simplicity: Avoid cluttered scenes with overwhelming numbers of competing lines. Instead, strive for simplicity by selecting one or two prominent leading elements to guide viewers’ focus.
Using leading lines effectively can:
- Infuse a sense of movement and dynamism into static compositions
- Establish spatial relationships within an image
- Enhance visual storytelling by guiding viewers through your intended narrative
- Evoke emotions such as curiosity, intrigue, or awe
Table Example:
| Examples of Leading Lines | Emotions Evoked |
|---|---|
| Railroad tracks | Sense of adventure and journey |
| Curving road | Wonder and anticipation |
| Shoreline | Calmness and tranquility |
| Tall buildings | Verticality and power |
By skillfully incorporating leading lines in your bird photography, you can create powerful images that captivate viewers. In the following section, we will explore how finding balance through symmetry further enhances composition in your photographs.
Finding Balance Through Symmetry
Transitioning from our exploration of utilizing leading lines to create impact, we now delve into another powerful compositional technique: finding Balance Through Symmetry. The artistry lies in capturing images that exude a sense of equilibrium and harmony by leveraging the principles of the golden ratio. Let us consider an example to better understand how this technique can elevate your bird photography.
Imagine you are photographing a majestic bald eagle perched on a branch against a serene background. By applying the concept of symmetry, you position the subject at the center of the frame while maintaining a symmetrical composition around it. This not only emphasizes the grandeur of the bird but also creates visual stability and aesthetic appeal.
To fully grasp how to implement this approach effectively, here are some key considerations:
- Balance: Achieving symmetrical composition involves distributing elements evenly across your frame. Maintain equal weight visually on both sides.
- Proportion: Utilize the golden ratio—a mathematical concept involving precise proportions—to determine where key elements should be placed within your image.
- Background Selection: Ensure that your chosen background complements and enhances the overall symmetry rather than detracting from it.
- Subject Placement: Position your main subject strategically to maximize its impact within the balanced framework.
By embracing these guidelines, you can produce photographs that capture viewers’ attention and evoke emotional responses. To illustrate further, let’s examine a table showcasing famous bird photographs that successfully employ symmetry using the golden ratio:
| Photograph | Photographer | Species |
|---|---|---|
| Image 1 | John Smith | Snowy Owl |
| Image 2 | Jane Brown | Flamingo |
| Image 3 | Michael Johnson | Swan |
| Image 4 | Emily Davis | Peacock |
As we conclude our discussion on finding balance through symmetry, we transition seamlessly into the next section, where we will explore how to unleash the magic of the golden ratio in bird photography. With a deep understanding of this compositional technique, you can take your images to new heights and create captivating visual narratives that resonate with viewers.
Unleashing the Magic of the Golden Ratio
Section H2: Finding Balance Through Symmetry
In the previous section, we explored the concept of finding balance through Symmetry in Bird Photography. By carefully arranging elements within the frame, photographers can create visually harmonious compositions that captivate viewers. Now, let us delve into another powerful tool that will help take your bird photography to new heights – uncovering the magic of the Golden Ratio.
Consider this hypothetical scenario: Imagine capturing an image of a majestic Bald Eagle soaring through the sky against a backdrop of fluffy white clouds. As you review the shot, you notice something missing – a sense of aesthetic perfection. This is where the Golden Ratio comes into play. Derived from mathematical principles found abundantly in nature and art, applying this ratio to your composition can enhance its visual impact.
To effectively utilize the power of the Golden Ratio in bird photography, keep these key points in mind:
- Symmetry with Purpose: Seek out natural symmetrical patterns or create them by positioning yourself at specific angles relative to your subject.
- Leading Lines: Incorporate leading lines that guide viewers’ eyes towards your focal point, creating a sense of movement and depth.
- Negative Space: Embrace negative space around your subject to emphasize its presence and draw attention to its details.
- Dynamic Placement: Experiment with placing your subject off-center using the Golden Ratio grid as a guide for optimal placement within your frame.
Now let’s explore these concepts further through an emotional lens:
| Column 1 | Column 2 | Column 3 |
|---|---|---|
| Elegance | Harmony | Balance |
| Gracefulness | Serenity | Beauty |
| Transcendence | Symmetry | Perfection |
| Captivation | Awe | Wonder |
In conclusion, understanding and utilizing the Golden Ratio in bird photography allows you to create captivating compositions that evoke a sense of elegance, harmony, and balance. By incorporating leading lines, negative space, and dynamic subject placement guided by the principles of the Golden Ratio, your images will not only convey aesthetic perfection but also resonate emotionally with viewers on a deeper level.
Transitioning into the subsequent section about “Creating Contrast with Foreground and Background,” we will explore yet another technique that can elevate your bird photography to new heights.
Creating Contrast with Foreground and Background
Unleashing the Magic of the Golden Ratio in bird photography opens up a world of possibilities when it comes to creating visually appealing compositions. By understanding how to effectively utilize this mathematical concept, photographers can elevate their images from ordinary to extraordinary.
Consider the following scenario: imagine capturing an image of a majestic bald eagle perched on a tree branch overlooking a serene lake. The composition is carefully framed using the principles of the golden ratio, placing the subject slightly off-center and allowing negative space to enhance visual balance. This deliberate arrangement draws viewers’ attention towards the eagle while maintaining harmony within the overall image.
To further enhance your compositions, here are some key techniques that can be employed:
- Leading Lines: Utilize natural elements such as branches or rocks to guide viewers’ eyes through the frame, leading them towards the main subject.
- Symmetry: Seek out opportunities where natural symmetry exists, whether it’s reflected in water or present in patterns found in nature.
- Scale: Incorporate elements of different sizes into your composition to create depth and add interest.
- Repetition: Look for repeating patterns or shapes that can help establish rhythm and visual consistency throughout your photograph.
Incorporating these techniques into your bird photography requires careful consideration and practice. However, with patience and dedication, you’ll begin to unlock new creative possibilities in your work.
Moving forward, let’s explore another essential aspect of bird photography: Creating Contrast with Foreground and Background. By mastering this technique, you will learn how to use contrasting elements within your frame to make your subjects truly stand out against their surroundings—resulting in captivating images that grab viewers’ attention at first glance.
Mastering Depth of Field for Stunning Shots
Having explored the technique of creating contrast between foreground and background, let us now delve into another fundamental aspect of bird photography – Mastering Depth of Field. Understanding how to control the depth of field can significantly enhance the overall impact and visual appeal of your photographs.
To illustrate this point, consider a scenario where you are photographing an elegant heron standing in shallow water amidst a lush green landscape. By utilizing a shallow depth of field, you can isolate the heron from its surroundings, making it the focal point of the image while beautifully blurring the background elements. This technique not only creates an aesthetically pleasing separation but also draws attention to the intricate details and gracefulness of the bird itself.
To effectively master depth of field for stunning shots in bird photography, consider employing these strategies:
- Selecting appropriate aperture settings: Experimenting with different aperture values allows you to control how much of your frame remains in sharp focus. Wider apertures (smaller f-numbers) result in a shallower depth of field, whereas narrower apertures (larger f-numbers) increase the area that appears sharp.
- Evaluating distance to subject: The proximity between your camera and subject plays a crucial role in determining depth of field. As you move closer to your subject, the resulting depth of field becomes narrower; conversely, increasing the distance expands it.
- Assessing lens focal length: Longer focal lengths tend to compress perspective and create a shallower depth of field compared to shorter focal lengths. Utilizing telephoto lenses enables you to capture intimate close-ups with creamy bokeh backgrounds.
- Considering sensor size: Full-frame cameras typically yield shallower depths of field than crop-sensor counterparts due to their larger sensors. Keep this factor in mind when deciding on equipment for achieving desired results.
By skillfully manipulating these variables, you can experiment with different creative possibilities and capture captivating bird photographs with striking depth of field effects.
Transitioning into the subsequent section about “Understanding the Importance of Composition in Bird Photography,” it is essential to recognize that Mastering Depth of Field constitutes just one aspect of creating visually compelling images. Understanding how to effectively compose your shots plays an equally significant role, enabling you to showcase the beauty and essence of birds in their natural habitats without distraction.
Understanding the Importance of Composition in Bird Photography
Bird photography is not just about capturing a bird in its natural habitat; it is also about creating visually pleasing and impactful images. The art of composition plays a vital role in achieving this goal. By understanding how to effectively compose your shots, you can elevate your bird photographs from ordinary snapshots to captivating works of art.
To illustrate the significance of composition, let’s consider a hypothetical scenario. Imagine photographing a majestic bald eagle perched on a branch against a clear blue sky. Without proper composition, the resulting image may lack impact and fail to convey the bird’s grandeur. However, by applying compositional techniques such as the rule of thirds and leading lines, we can create an engaging photograph that draws viewers into the scene, highlighting both the beauty of the bird and its surroundings.
Here are some essential elements to keep in mind when composing your bird photographs:
- Balance: Strive for balance between different elements within your frame. This could mean placing your subject off-center while maintaining visual equilibrium with other objects or negative space.
- Leading Lines: Utilize natural lines (such as branches or shorelines) to guide viewers’ eyes towards your focal point—the bird itself.
- Framing: Incorporate natural frames (such as tree branches or leaves) around your subject to add depth and draw attention directly to the bird.
- Point of View: Experiment with various angles and perspectives to find unique viewpoints that add interest and emphasize important details.
| Rule of Thirds | Leading Lines | Framing | Unique Perspectives |
|---|---|---|---|
| Guides eye | Directs focus | Adds depth | Enhances interest |
| Balances | Creates movement | Highlights | Emphasizes details |
| Off-center | Adds dynamism | Draws attention | Captures uniqueness |
By incorporating these compositional elements into your bird photography, you can create visually compelling images that captivate viewers and tell a story.
Building upon our understanding of composition, let us now delve into the technique of utilizing the rule of thirds to enhance the visual impact of your bird images.
Elevating Your Images with the Rule of Thirds
Having understood the significance of composition, we now delve into another fundamental aspect that can greatly enhance your bird photography – the utilization of negative space. By purposefully creating areas devoid of any subject or detail within your frame, you can evoke a sense of simplicity and focus attention on the main subject. Let’s explore how this technique can elevate your images.
One effective way to understand the impact of negative space is through an example. Consider a photograph depicting a solitary heron perched on a branch against a clear blue sky. By incorporating ample negative space around the bird, allowing for breathing room within the composition, you create a visually striking image that emphasizes both the elegance of the heron and its surroundings.
To fully comprehend how to utilize negative space effectively, consider these key points:
- Negative space provides balance and visual relief to avoid cluttered compositions.
- It helps accentuate the subject by drawing attention directly to it.
- Incorporating negative space creates opportunities for emphasizing form, shape, and isolation.
- The use of negative space allows viewers to interpret and engage with an image more actively.
To illustrate further, here is an example table showcasing different photographs capturing birds with varying amounts of negative space:
| Photograph | Amount of Negative Space | Emotional Response |
|---|---|---|
| Image 1 | Minimal | Intimacy |
| Image 2 | Moderate | Serenity |
| Image 3 | Abundant | Freedom |
| Image 4 | None | Claustrophobia |
By thoughtfully utilizing negative space in your bird photography, you have the power to elicit specific emotional responses from your audience while maintaining focus on your subjects. This technique enables viewers to appreciate not only the beauty and intricacies of birds but also their connection with their environment.
Now that we have explored the impact of negative space, let us uncover another technique that can enhance your bird photography even further – enhancing visual flow with leading lines.
Enhancing Visual Flow with Leading Lines
Having understood the significance of composition in bird photography, we now delve into another crucial element that can elevate your images to new heights – color contrast. By skillfully utilizing colors and their interactions within your frame, you can create visually captivating photographs that captivate viewers’ attention. In this section, we will explore the power of color contrast and its impact on bird photography.
Example:
Imagine a striking image showcasing a vibrant blue jay perched on a tree branch against a backdrop of lush green foliage. The contrasting hues of blue and green not only highlight the beauty of the subject but also add depth and visual interest to the photograph. This example illustrates how effectively employing color contrast can transform an ordinary scene into a remarkable one.
Paragraph 1:
Color contrast refers to the juxtaposition of different colors in an image to create visual tension or harmony. It plays a vital role in directing viewers’ gaze towards specific elements within a photograph, emphasizing subjects, and evoking emotional responses. Understanding various techniques for using color contrast allows photographers to convey moods, enhance storytelling, and elicit powerful reactions from their audiences.
Paragraph 2 (Bullet Point List):
To harness the potential of color contrast in your bird photography compositions, consider incorporating these techniques:
- Complementary Colors: Pairing colors opposite each other on the color wheel creates high-contrast combinations that demand attention.
- Analogous Colors: Using adjacent colors on the color wheel produces harmonious compositions with subtle variations.
- Warm vs. Cool Colors: Contrasting warm tones (reds, oranges) with cool tones (blues, greens) adds visual interest and balance.
- Light vs. Dark Colors: Placing light-colored subjects against dark backgrounds or vice versa enhances focus and creates drama.
Paragraph 3 (Table):
In addition to understanding these techniques conceptually, it is essential to grasp their practical applications. The table below provides examples of color contrast techniques and their potential effects on bird photography:
| Technique | Effect |
|---|---|
| Complementary | Creates dynamic and attention-grabbing compositions |
| Analogous | Produces harmonious and soothing visuals |
| Warm vs. Cool | Contrasts emotions or temperature in the image |
| Light vs. Dark | Adds visual depth and dramatic impact |
By mastering these techniques, you can infuse your bird photographs with a captivating interplay of colors, enhancing their overall impact.
As we have explored the power of color contrast, it is now time to delve into another aspect that contributes to achieving harmonious compositions – symmetry. By understanding how to effectively incorporate symmetrical elements within your frame, you can create visually balanced and aesthetically pleasing images that command viewers’ attention without explicitly stating “step.”
Achieving Harmonious Compositions through Symmetry
In the previous section, we explored how leading lines can enhance the visual flow in bird photography. Now, let us delve into another crucial aspect of composition: achieving harmonious compositions through symmetry. To illustrate this concept, imagine capturing an image of a flock of birds flying in perfect formation, creating a symmetrical pattern across the frame. This creates a sense of balance and harmony that is visually captivating.
When it comes to incorporating symmetry into your bird photography compositions, there are several techniques you can employ:
-
Reflections: Seek out bodies of water or other reflective surfaces where you can capture mirrored images of birds and their surroundings. The reflection adds a layer of symmetry to the photograph, drawing the viewer’s attention to both the subject and its reflection simultaneously.
-
Patterns and repetitions: Look for repetitive elements in nature such as rows of trees or branches, patterns on feathers, or even groups of birds aligned in a specific way. By centering these repeating elements within your frame, you create a strong sense of symmetry that appeals to our innate sense of order.
-
Vertical and horizontal lines: Utilize architectural structures like buildings or fences to introduce vertical and horizontal lines into your composition. These lines act as guides for viewers’ eyes, leading them towards the main subject while adding a pleasing geometric element to the overall image.
-
Framing within frames: Incorporate natural or man-made frames around your subject to establish a symmetrical structure within the photograph itself. This technique adds depth and context while emphasizing the central focus point.
To further emphasize the impact of Symmetry in Bird Photography compositions, consider the following examples:
| Subject | Symmetry Technique |
|---|---|
| Flock flying | Perfect alignment |
| Birds perched | Balanced formations |
| Wingspread | Mirrored reflections |
| Nest | Geometric framing |
By employing these techniques, you can create visually striking bird photography compositions that evoke a sense of harmony and balance. In the subsequent section, we will explore another important aspect: unlocking the secrets of the Golden Ratio in bird photography. This mathematical principle has long been used by artists to achieve aesthetically pleasing compositions, and it holds great potential for enhancing your bird photographs as well.
Unlocking the Secrets of the Golden Ratio in Bird Photography
Section H2: Achieving Harmonious Compositions through Symmetry
Building upon the concept of achieving harmonious compositions through symmetry, we now delve into another powerful tool that can elevate your bird photography to new heights – unlocking the secrets of the Golden Ratio. By understanding and applying this mathematical principle, you will be able to create visually pleasing images that captivate viewers with their innate balance and harmony.
The Golden Ratio is a mathematical ratio derived from Fibonacci numbers, which have been observed in nature for centuries. It is often represented by the symbol φ (phi) and has a value approximately equal to 1.61803398875. When applied in visual arts like photography, it helps create aesthetically pleasing compositions that draw the eye naturally towards key elements within an image.
To incorporate the Golden Ratio effectively in your bird photography, consider these steps:
- Composition Alignment: Positioning your subject along one of the lines or intersections formed by dividing your frame according to the Golden Ratio can instantly enhance its visual impact.
- Leading Lines: Utilize leading lines such as branches or other natural elements to guide the viewer’s gaze towards your focal point, following the curves established by this divine proportion.
- Negative Space: Employing negative space strategically around your subject allows for breathing room and emphasizes its presence while maintaining a sense of equilibrium.
- Crop Considerations: During post-processing, keep in mind the principles of the Golden Ratio when cropping your image, ensuring that important details align with significant points on this geometric grid.
Table Example:
| Subject Placement | Result |
|---|---|
| Along golden lines | Balanced composition |
| Off-center | Dynamic tension |
| Intersecting points | Focal emphasis |
| Centered | Calm stability |
By incorporating these techniques based on the Golden Ratio, you can add depth and interest to your bird photographs while creating a visually engaging experience for your audience.
Moving forward, let’s explore yet another essential aspect of bird photography – playing with depth of field to capture striking bird photos.
Playing with Depth of Field to Capture Striking Bird Photos
Transitioning smoothly from our exploration of the Golden Ratio, we now turn our attention to another crucial element in bird photography: lighting. Understanding and harnessing the power of light can greatly enhance the visual impact of your bird photos. To illustrate this point, let’s consider a hypothetical scenario where you are capturing an image of a majestic bald eagle perched on a tree branch.
One might argue that without proper lighting, even the most well-composed photograph may fall short in delivering its intended message. Here are three key aspects to consider when it comes to lighting:
-
Natural Light: The time of day plays a vital role in determining the quality and direction of natural light available for your bird photography. Early mornings and late afternoons often offer soft, warm hues that add depth and dimensionality to your images. Experiment with different angles and observe how sunlight interacts with your subject.
-
Backlighting: Utilizing backlighting techniques can create stunning silhouettes or halo effects around birds, adding drama and intrigue to your photographs. By positioning yourself so that the sun is behind your subject, you can capture striking outlines while still maintaining some detail within the bird.
-
Fill Flash: In situations where there is insufficient natural light or challenging shadows cast upon your subject, fill flash can be employed as a supplementary light source. This technique helps balance exposure by illuminating darker areas, resulting in more evenly lit images without overpowering highlights.
To further emphasize the significance of lighting in bird photography, let us explore a table showcasing various lighting conditions and their corresponding impacts on bird images:
| Lighting Condition | Impact on Image |
|---|---|
| Harsh midday sun | High contrast |
| Soft morning glow | Warm tones |
| Overcast skies | Diffused light |
| Golden hour | Dramatic hues |
By carefully considering and manipulating lighting conditions, you can evoke different emotions in your audience. The interplay of light and shadow enhances the visual story, capturing the essence of birds in their natural habitats.
In summary, mastering bird photography requires a deep understanding of not only composition but also the power of lighting. By experimenting with various lighting techniques such as natural light, backlighting, and fill flash, you can transform an ordinary image into a captivating one. Remember to observe how different lighting conditions affect your subject and use them to tell compelling stories through your photographs.
Comments are closed.