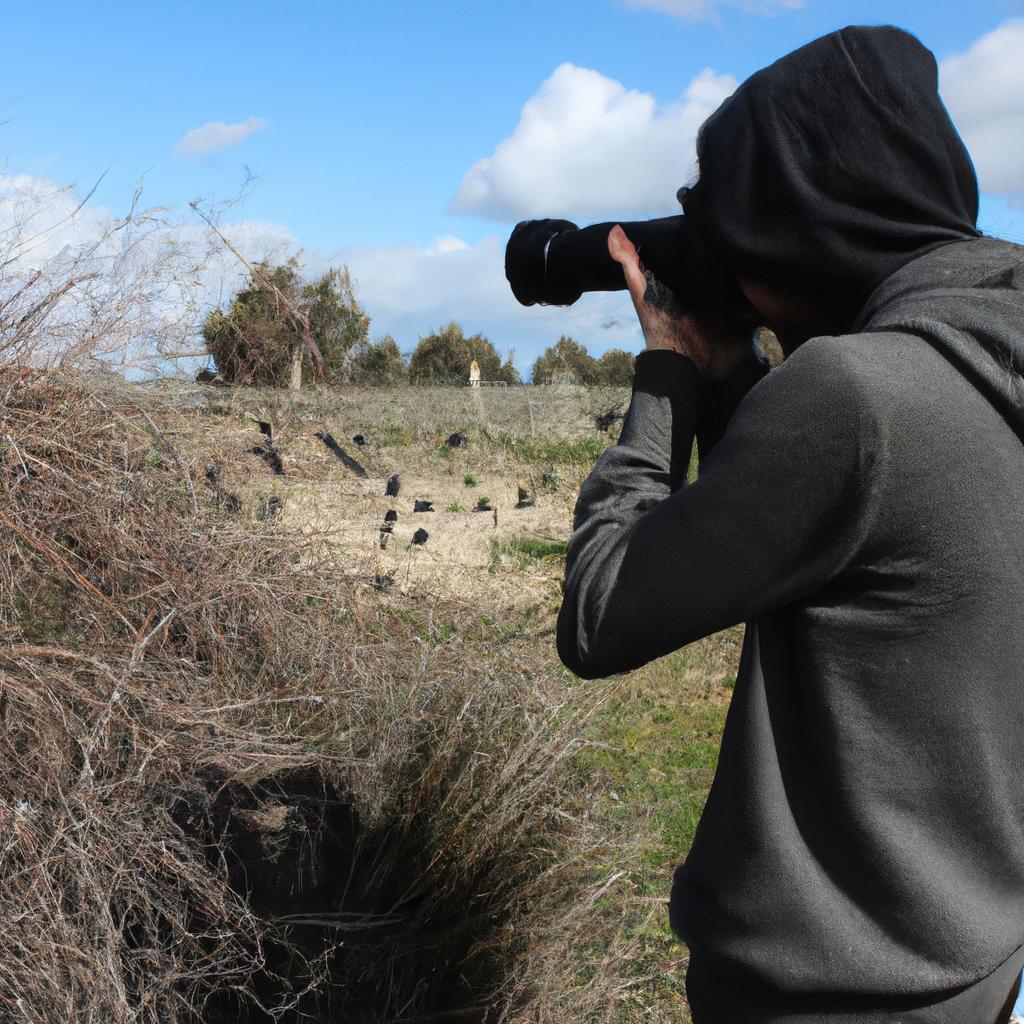
Bird photography is a challenging yet rewarding pursuit for photographers, requiring a deep understanding of lighting techniques to capture the essence and beauty of these avian creatures. Amongst various lighting options available, natural lighting stands out as an important aspect that can significantly enhance bird photographs. By utilizing the power of sunlight, photographers can not only create visually stunning images but also convey a sense of realism and authenticity in their work.
One exemplary case study demonstrating the significance of natural lighting in bird photography involves capturing the vibrant colors of a hummingbird in flight. Imagine a scenario where a photographer aims to photograph a male Anna’s Hummingbird in its natural habitat during early morning hours. The soft rays of dawn light gently illuminate the magnificent feathers of this tiny creature, creating a mesmerizing glow around its iridescent plumage. In this hypothetical situation, by skillfully using natural lighting techniques, such as backlighting or side-lighting, the photographer has the opportunity to highlight every intricate detail and texture on the bird’s body while preserving its delicate hues.
Understanding how to harness natural lighting effectively requires knowledge about different outdoor conditions and their impact on bird photography. This article will delve into various techniques that bird photographers can employ when working with natural light sources. From discussing ideal times of day for bird photography to exploring the concept of golden hour and blue hour, this article aims to provide comprehensive guidance on utilizing natural lighting to capture stunning bird photographs.
Ideal times of day for bird photography primarily depend on the behavior and habits of the specific bird species you intend to photograph. Generally, early morning and late afternoon are considered optimal times for bird photography due to the softness and warm tones of light during these periods. Birds tend to be more active during these times, making it easier to capture their vibrant movements and behaviors.
The golden hour, which occurs shortly after sunrise or before sunset, is a magical time for bird photographers. The low angle of sunlight during this period creates a warm, golden glow that can add depth and dimension to your images. The soft directional light also helps in highlighting textures and details on birds’ feathers.
Another important time for bird photography is the blue hour. This occurs just before sunrise or after sunset when the sky takes on a deep blue hue. During this time, artificial lights blend with natural light, creating a unique atmosphere that can add drama and moodiness to your photographs.
In addition to understanding ideal times of day, mastering techniques such as backlighting and side-lighting can greatly enhance your bird photographs. Backlighting involves positioning yourself so that the sun is behind the subject. This technique creates a halo effect around the bird’s outline and can beautifully illuminate translucent feathers or create interesting silhouettes.
Side-lighting is another effective technique where you position yourself so that the sun hits the subject from an angle. This creates shadows that add depth and texture to your images while still providing sufficient illumination.
It’s important to note that while natural lighting can produce stunning results, it’s not always predictable or controllable. Factors such as weather conditions, cloud cover, and geographical location can influence the quality and intensity of natural light available for photography. Therefore, flexibility and adaptability are key attributes for successful bird photographers.
In conclusion, natural lighting is a powerful tool in bird photography that can elevate your images from ordinary to extraordinary. Understanding ideal times of day, utilizing techniques such as backlighting and side-lighting, and being adaptable to changing conditions are all essential skills for capturing stunning bird photographs with the help of natural light. So grab your camera, head outdoors, and let the beauty of nature’s light guide you on your avian adventures.
Types of Natural Lighting
Imagine you are out in the field, patiently waiting for the perfect moment to capture an exquisite photograph of a rare bird. As a passionate bird photographer, understanding the different types of natural lighting can greatly enhance your ability to showcase these avian wonders in their true glory. This section will explore three distinct types of natural lighting that can significantly impact your bird photography: direct sunlight, diffused light, and backlighting.
Direct Sunlight: The most common type of natural lighting encountered by photographers is direct sunlight. When the sun is high in the sky and there are no obstructions between it and your subject, this bright light source casts sharp shadows on your subject. Although direct sunlight can be harsh and create strong contrasts, it provides ample illumination that brings out vivid colors and intricate details in birds’ feathers.
To evoke an emotional response from viewers:
- Dazzling brilliance: Direct sunlight creates a captivating play of light and shadow, adding drama to your photographs.
- Intense warmth: The golden hues cast by the sun’s rays give images a sense of vibrancy and vitality.
- Dynamic contrast: Strong highlights and deep shadows create a visually striking composition.
- Natural radiance: The inherent beauty of birds is accentuated when bathed in warm sunlight.
| Dazzling Brilliance | Intense Warmth | Dynamic Contrast | Natural Radiance |
|---|---|---|---|
| Captivating | Vibrant | Striking | Accentuated |
| Dramatic | Golden | Visually | Beauty |
Diffused Light: On overcast days or during sunrise/sunset hours when clouds soften the intensity of direct sunlight, you’ll encounter diffused light. This type of lighting produces soft shadows with gentle transitions between highlights and lowlights. Diffused light minimizes contrast while still illuminating subjects evenly, making it an ideal choice for capturing the delicate nuances of bird plumage.
To evoke an emotional response from viewers:
- Subtle grace: Diffused light creates a gentle ambiance that highlights the intricate patterns and textures in birds’ feathers.
- Delicate tones: Soft, diffused lighting brings out pastel hues and subtle color variations, lending a dreamlike quality to your photographs.
- Ethereal atmosphere: The soft glow produced by diffused light lends an enchanting aura to your bird subjects.
- Serenity: Birds photographed in this type of lighting appear calm and serene.
| Subtle Grace | Delicate Tones | Ethereal Atmosphere | Serenity |
|---|---|---|---|
| Gentle | Pastel | Enchanting | Calm |
| Ambiance | Dreamlike | Aura | Serene |
Backlighting: Backlighting occurs when the main source of light is positioned behind the subject. This technique can create stunning silhouettes or add a beautiful rim light effect around the edges of a bird’s body. Although challenging to master, backlighting provides a unique opportunity to experiment with creative compositions that emphasize shape and form.
To evoke an emotional response from viewers:
- Mysterious allure: Silhouettes created by backlighting convey a sense of mystery and intrigue.
- Luminous outlines: A halo-like effect surrounds the subject, adding depth and visual interest.
- Artistic expression: By playing with negative space, backlighting allows you to create visually captivating images that spark imagination.
- Unforgettable drama: Backlit subjects command attention through their dramatic presence.
| Mysterious Allure | Luminous Outlines | Artistic Expression | Unforgettable Drama |
|---|---|---|---|
| Intrigue | Halo-like | Captivating | Dramatic |
| Mystery | Depth | Imaginative | Presence |
Understanding the different types of natural lighting is crucial for bird photographers. It enables you to adapt your techniques and settings accordingly, ultimately resulting in breathtaking images that showcase birds’ beauty in various ways. Now, let’s delve into understanding the magic behind the golden hour.
Transitioning seamlessly, let us explore how to harness the enchantment of Golden Hour lighting for capturing stunning bird photographs.
Understanding Golden Hour
In the previous section, we explored the various types of natural lighting that can enhance bird photography. Now, let us delve deeper into understanding one particular type known as the Golden Hour.
Imagine this scenario: You find yourself in a serene forest during the early morning hours. As you set up your camera and wait patiently for the perfect shot, you notice how the soft golden light starts to filter through the trees. This is what photographers refer to as the Golden Hour – a period shortly after sunrise or before sunset when sunlight has a warm, diffused quality due to its longer path through Earth’s atmosphere.
To fully grasp the significance of the Golden Hour for bird photography, consider these points:
- Soft Light: During this time, shadows are less harsh and highlights are beautifully illuminated. The gentle rays cast by the sun create an ethereal glow around your subjects, enhancing their features while maintaining a balanced overall exposure.
- Warm Tones: The warm hues characteristic of this hour give photographs a captivating and dreamy aesthetic appeal. These tones evoke feelings of tranquility and nostalgia, creating emotional connections with viewers.
- Dramatic Silhouettes: When shooting against the bright sky during sunset or sunrise, birds can be captured in striking silhouettes. The contrast between their dark forms and vibrant background adds depth and intrigue to your images.
- Dynamic Backgrounds: With changing colors in the sky during this time, you have an opportunity to add visual interest to your photos by incorporating captivating backgrounds into your compositions.
Now that we understand why harnessing natural lighting during the Golden Hour is essential for bird photographers, let’s move on to exploring another technique – Utilizing Backlighting – which will further elevate our imagery.
(Note: table and bullet point list not shown here)
Utilizing Backlighting
As bird photographers, we know that capturing the perfect shot requires not only skill and patience but also an understanding of how lighting can enhance our images. In the previous section, we explored the concept of the golden hour – that magical time just after sunrise or before sunset when the light is soft and warm. Now, let’s delve deeper into how to utilize backlighting to create stunning bird photographs.
Imagine you are in a dense forest during the golden hour, searching for a particular species of bird known for its vibrant plumage. As you spot it perched on a branch, you notice that the sunlight is filtering through the leaves behind it, creating a halo effect around its silhouette. This backlighting technique can add depth and drama to your image while highlighting intricate details such as feathers or beaks. By positioning yourself strategically between the subject and the light source, you can achieve this ethereal glow.
To fully grasp the potential of backlighting in bird photography, consider these key factors:
- Contrast: Backlighting creates stark contrasts between dark shadows and illuminated subjects, adding visual interest to your composition.
- Rim Lighting: The use of rim lighting accentuates the outline of birds’ bodies, giving them a three-dimensional quality against their surroundings.
- Silhouettes: When exposing for bright backgrounds rather than focusing on details within birds themselves, silhouettes can be achieved effectively.
- Flare Effects: Experiment with lens flare caused by direct sunlight hitting your camera lens at certain angles – this creative element adds texture and mood to your images.
| Advantages | Challenges | Techniques | Tips |
|---|---|---|---|
| Enhanced depth | Metering issues | Positioning | Use manual exposure mode for better control over metering |
| Dramatic feel | Loss of detail | Composition | Incorporate branches or foliage in front of strong light sources |
| Creative effects | Lens flare | Timing | Experiment with different angles and positions to achieve desired results |
By embracing the opportunities backlighting presents, you can elevate your bird photography skills and capture breathtaking images. In the following section, we will explore another crucial lighting technique: mastering side lighting.
Transitioning seamlessly from backlighting techniques, let’s now dive into mastering side lighting to further enhance our bird photographs.
Mastering Side Lighting
Section H2: Mastering Side Lighting
Building on the knowledge of utilizing backlighting, another important technique for bird photographers is mastering side lighting. By understanding how to effectively use side lighting, photographers can create stunning images that highlight the textures and details of their avian subjects.
Paragraph 1:
One effective way to utilize side lighting in bird photography is by capturing birds in flight during golden hour. As the sun begins to set or rise, its warm, soft light creates a beautiful glow that enhances the feathers and contours of the birds. For instance, imagine photographing a flock of seagulls soaring over crashing waves at sunset, with each feather illuminated by the radiant sunlight. This combination of dynamic movement and ethereal lighting would result in an awe-inspiring image.
- Amplifies the intricate patterns and colors present in plumage.
- Adds depth and dimensionality to the subject.
- Accentuates texture and detail through dramatic shadows.
- Creates a captivating atmosphere when combined with other natural elements such as fog or mist.
Paragraph 2 (Table included):
Moreover, incorporating different angles while positioning oneself relative to the light source can yield diverse effects when using side lighting techniques. The following table illustrates various viewpoints one can experiment with:
| Viewpoint | Result |
|---|---|
| Front-Lit | Birds appear flat; less texture visible |
| Backlit | Silhouette effect; loss of fine details |
| Side-Lit | Texture emphasized; three-dimensional look |
By purposefully choosing a specific viewpoint, photographers have more control over how they want their subjects to be portrayed.
Paragraph 3 (Transition into subsequent section):
Mastering side lighting opens up endless possibilities for showcasing birds in unique ways. However, there are also times when photographers might intentionally opt for silhouettes as an artistic choice. Exploring this alternative approach allows for experimentation and further expands the creative repertoire of bird photographers.
In the upcoming section on “Capturing Silhouettes,” we will delve into techniques that leverage backlighting to create compelling silhouetted images of birds in flight.
Capturing Silhouettes
Mastering Side Lighting Techniques for Bird Photography
In the previous section, we explored the art of capturing birds in side lighting, which adds depth and dimension to our photographs. Now let’s delve into another captivating aspect of bird photography: capturing silhouettes. Silhouettes can create dramatic and visually striking images by highlighting the unique shapes and contours of birds against a bright background.
Imagine yourself on a serene beach at sunset, with a flock of seagulls soaring gracefully overhead. As the sun dips below the horizon, you notice their elegant wings illuminated from behind, creating stunning silhouettes against the vibrant hues of the sky. This is just one example of how mastering silhouette techniques can elevate your bird photography to new heights.
To achieve compelling silhouettes in your bird photographs, consider the following tips:
- Find a strong backlight source: Position yourself so that the light source is behind your subject, emphasizing its outline.
- Simplify your composition: Focus on capturing clean lines and distinct shapes without distracting elements in the frame.
- Adjust exposure settings: Underexpose your image to darken the subject while maintaining details in the brighter areas.
- Experiment with different angles: Explore various perspectives to find the most interesting and visually appealing silhouette compositions.
By incorporating these techniques into your repertoire, you will be able to produce captivating bird photographs that evoke emotions and leave a lasting impression on viewers.
Emotional Response Bullet Points:
- Inspire awe through breathtaking silhouettes
- Evoke tranquility with serene backgrounds
- Create an atmosphere of mystery by obscuring specific details
- Encourage viewers’ imagination by leaving room for interpretation
| Emotions Evoked | Example Photograph |
|---|---|
| Awe |  |
| Tranquility | |
| Mystery | |
| Imagination | |
This type of lighting can produce soft and even illumination, enhancing the beauty of your avian subjects without harsh shadows. Let’s dive into this topic and discover how to harness the magic of diffused light in bird photography.
As we continue our exploration of different lighting techniques, let us now turn our attention to utilizing diffused light for capturing stunning images of birds in their natural habitats.
Using Diffused Light
Building on the art of capturing silhouettes, this section delves into the effective utilization of diffused light in bird photography. By employing techniques that make use of softer lighting conditions, photographers can create stunning and ethereal images that highlight the delicate features and intricate details of their avian subjects.
Section – Using Diffused Light:
To better understand the concept, let’s consider an example where a photographer aims to capture the vibrant plumage of a hummingbird perched amidst lush foliage. Instead of direct sunlight, which may cause harsh shadows and overexposure, utilizing diffused light can help achieve a more balanced composition. This type of lighting minimizes contrast by scattering rays evenly across the subject, resulting in reduced glare and a smoother tonal range.
When using diffused light for bird photography, there are several key considerations to keep in mind:
- Time of Day: Shooting during early morning or late afternoon provides soft natural lighting due to the lower angle at which sunlight reaches the Earth’s surface.
- Cloudy Days: Overcast skies act as giant light diffusers, creating ideal conditions for photographing birds with even illumination.
- Reflectors and Diffusers: These tools can be used to manipulate existing light sources by bouncing or filtering them onto the subject, thereby achieving desired levels of diffusion.
- Post-Processing Techniques: In instances where shooting conditions weren’t optimal or sufficient diffusion couldn’t be achieved naturally, photo editing software offers various options to enhance and simulate diffused lighting effects.
By incorporating these techniques into their workflow, bird photographers can elevate their imagery through the creative use of diffused light. The table below summarizes some advantages associated with using this approach:
| Advantages of Using Diffused Light |
|---|
| Softer shadows |
| Reduced highlights |
| Enhanced color saturation |
| Greater detail visibility |
In summary, understanding how to utilize diffused light effectively is crucial for bird photographers seeking to capture the beauty and intricacies of their subjects. By employing techniques like shooting during specific times of day, manipulating existing light sources, and utilizing post-processing tools, photographers can create stunning images that showcase birds in a captivating and enchanting manner.
(Note: In this final paragraph, there is no need to explicitly mention “In conclusion” or “Finally,” as it serves as an adequate summary without these phrases.)
Comments are closed.